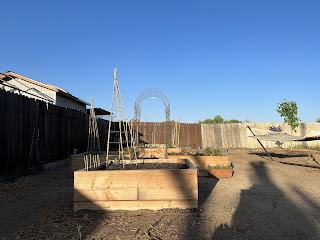
I have been so busy with the garden this summer that I haven’t posted since May, but I am going to fill in the gaps the best that I can. As the season is winding down now I have a little more time so I can sit down to write a bit and post some photos and update on my experiences with the new garden this year.
My goal here was to build the new back annual flower garden and veggie garden and plant everything in that two weeks time. I had a little map that I sketched out to assist me with where the placement was. Since I do work a full time job it is difficult to balance my time with everything I need to do in the garden but I did take some time off from work in spring so that I could get everything I needed to get done.
In my last post, the front perennial garden was just starting to wake up at the end of May and I was building the back garden, filled the boxes with dirt and I added an arbor and some teepees for some sugar snap peas. I added some solar twinkle lights to the arbor and finished staining this next section of fence. This is also the same week that I transplanted all of my seedlings from the apartment.
The seedlings were under grow Iights for far too long that they needed to be planted out as soon as possible.This was also the first time that I tried growing dahlias and knew nothing about them. They did start to sprout during the time they arrived in the mail in February and I decided that I would try and keep them in shallow trays with a little soil to keep them happy until it was time to plant out. This only lasted for a short time as they started to grow very tall and I made some quick fabric totes so I could add deeper soil as I was worried that I was going to lose them. I still had a few months before I could plant them out as my last frost date was May 15
In my next post I will show the dahlias, so you will see how they got too big for my shelves inside, and the little totes that I made from some old scrap fabrics. The totes allowed me to move them around and position them on my shelves much easier than the shallow plastic trays that they outgrew. Once it was time to plant out, I threw them in the car to move to the permanent location. The totes also allowed me to leave them outside for a couple days until the new boxes were ready. It probably wasn’t the ideal situation but I made it all work


No comments:
Post a Comment